
Resin Jewellery: Mixing, Bubbles and Curing
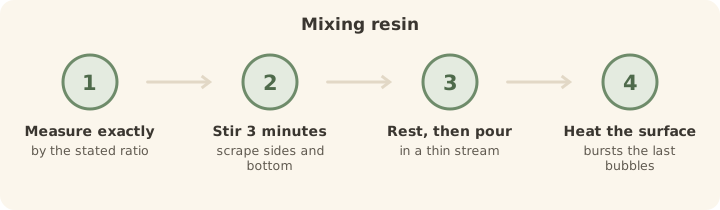
Measure resin and hardener exactly by the ratio on the bottle, stir slowly for a full three minutes scraping the sides, and let it cure at a warm, steady room temperature.
Sticky resin is almost always an inaccurate ratio or under-mixing — not a bad batch.
Resin is unforgiving in one specific way — the chemistry only works at the correct ratio — and forgiving in most others. Get the measuring right and the rest is straightforward.
Mixing properly
Measure by the stated ratio
Some resins are 1:1 by volume, others 2:1 by weight. Read the bottle, use graduated cups or scales, and don't estimate. This single step causes most failures.
Stir slowly for three full minutes
Scrape the sides and the bottom of the cup as you go — unmixed resin clinging to the walls is the usual reason for sticky patches. Slow stirring folds in fewer bubbles than fast.
Let it rest, then pour
Leaving the mixed resin for five minutes lets many bubbles rise on their own. Then pour slowly into the mould in a thin stream, which breaks bubbles as it goes.
Remove the last bubbles
Pass a heat gun or a lighter flame briefly across the surface from a few inches away — the warmth bursts surface bubbles instantly. Don't dwell in one spot.
Sizing findings for resin pieces
Resin pendants need the right jump rings and bails to carry their weight. Our wire gauge identifier tells you what gauge your wire is and what it will hold.
Temperature matters more than time
Resin cures by chemical reaction, and cold slows it dramatically. A cold room can leave a piece tacky for days or permanently. Aim for a steady 21 to 24°C, and warm the bottles in a bowl of warm water before mixing if your workroom is chilly — warmer resin also pours thinner and releases bubbles more readily.
Ventilate, and protect your skin. Work in a well-aired room, wear nitrile gloves, and keep resin off your skin — sensitisation builds with repeated exposure, and people who develop it usually have to give the craft up entirely. It's a straightforward risk to avoid from the start.
Embedding things
Dried flowers, glitter and small charms all embed beautifully. Anything containing moisture — fresh flowers, leaves, food — will brown and rot inside the resin over months. Dry botanicals thoroughly in silica gel first, and seal porous items such as paper with a thin coat of resin or PVA before embedding, or they'll darken as the resin soaks in.
Layers for depth
Pouring in thin layers, letting each become tacky before adding the next, lets you suspend objects at different depths rather than having everything sink to the bottom. It takes longer and it's how the pieces you admire online are made.
Questions we're often asked
Why is my resin still sticky?
Almost always an inaccurate ratio or insufficient mixing. Measure exactly as the bottle states, and stir for a full three minutes scraping the sides and bottom of the cup.
How do I get rid of bubbles in resin?
Stir slowly, let the mixed resin rest five minutes, pour in a thin stream, then pass a heat gun briefly over the surface from a few inches away.
Can I put fresh flowers in resin?
Not successfully — the moisture causes browning and decay inside the piece. Dry flowers completely, ideally in silica gel, before embedding them.