
Photographing Handmade Items So They Look Their Best
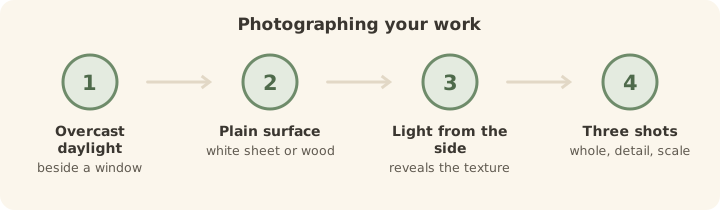
Shoot beside a window on an overcast day, on a plain light surface, with the light coming from the side rather than behind you. Turn the flash off.
That's genuinely the whole thing — daylight and a plain background beat any amount of equipment.
Whether you're selling, sharing in a group or simply keeping a record, a good photograph makes handmade work look like what it is. A bad one makes a beautiful jumper look like a heap of wool on a carpet.
Four steps to a decent photo
Find the right light
Next to a window, on a bright but overcast day. Direct sunshine creates harsh shadows and blows out pale yarn; cloud is a giant softbox. Turn off the room lights, which cast an orange colour over everything.
Use a plain surface
A white sheet, a wooden table, a plain wall. Patterned backgrounds compete with the item — and with anything knitted or stitched, the texture is the subject.
Light from the side
Side light rakes across the surface and reveals texture — cables, stitches, weave. Light from behind the camera flattens everything. This is the single biggest difference between an amateur and a professional-looking craft photo.
Take a detail shot too
One photo of the whole item, one close-up of the texture, and one showing scale — worn, held, or beside a familiar object. Three photos tell the story that one can't.
Selling as well as sharing?
Good photographs are half of selling handmade. The other half is pricing properly — our guide on pricing handmade items covers the formula and the honest maths.
Getting colours accurate
Colour is where craft photos most often mislead, and an inaccurate photo leads to disappointed buyers. Shoot in daylight, avoid coloured walls that reflect a tint onto your item, and compare the photo with the real thing before posting. If your phone lets you adjust white balance, set it rather than leaving it automatic.
Photograph everything you make. Not for social media — for yourself. A photo record of finished projects, with the yarn and needle noted, becomes genuinely useful within a year or two, and it's the only way you'll ever notice how far your work has come.
Simple things that help
- Clean your phone lens. It lives in a pocket. This takes two seconds and improves every photo.
- Steady the camera against a shelf or a stack of books rather than holding it free.
- Fill the frame — get closer than feels natural. Cropping later loses quality.
- Iron or block first. A creased, unblocked item photographs badly however good the light.
Questions we're often asked
What is the best light for photographing crafts?
Indirect daylight beside a window on an overcast day, with the light coming from the side. Turn off room lights and the flash, both of which distort colour.
Do I need a lightbox?
Not for most craft photography. A window and a plain white sheet do the same job. Lightboxes suit very small items such as jewellery, where controlling reflections matters more.
Why do my photos not match the real colour?
Usually artificial light or automatic white balance. Shoot in daylight, avoid strongly coloured walls nearby, and check the photo against the item before you post it.