
Why Candles Tunnel, Sink and Frost — and How to Fix It
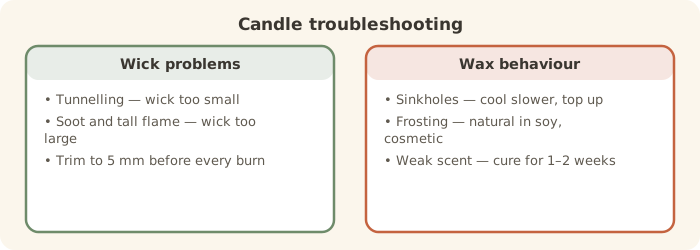
Candle making is mostly straightforward until the wax cools and something looks wrong. Almost every fault has one of a handful of causes, and none of them means you've ruined anything.
Tunnelling
The candle burns straight down the middle leaving a wall of unmelted wax. This is usually the wick being too small for the container, so the melt pool never reaches the edges. It can also be caused by the very first burn being too short.
The fix: go up a wick size. And on the first burn of any candle, let it run until the melt pool reaches the edges — usually two hours or so. Wax has a memory, and that first burn sets the pattern for every burn afterwards.
Start with the right quantities
Our candle wax calculator gives the wax weight, fragrance oil and a starting wick size for any container — including tapered jars — plus how much extra to melt.
Sinkholes and dips around the wick
The surface sets beautifully and then develops a crater overnight. This is simply soy wax cooling unevenly and shrinking as it sets — a quirk of the wax rather than a mistake.
The fix: pour a little cooler, cool the candles slowly in a warm room away from draughts, and hold back a small amount of wax for a second top-up pour once the first has set. A heat gun waved gently over the surface also melts the top smooth.
Frosting
White crystalline patches appear on the surface or the sides, usually on coloured candles. This is soy wax doing what natural soy does — recrystallising. It is entirely cosmetic and affects nothing about the burn or the scent.
The fix: there isn't a complete one, and commercial makers largely accept it. Pouring cooler, avoiding dye, and storing candles at a steady temperature all reduce it. Many makers simply mention it on the label as a mark of natural wax, which is both true and rather charming.
Weak scent throw
The candle smells wonderful cold and of almost nothing when lit. Three usual causes: the fragrance load is too low, the candle hasn't cured, or the fragrance was added at the wrong temperature.
The fix: use a 10% load for most container waxes, add the fragrance at the temperature your wax supplier specifies (usually around 60–65°C), stir gently for a full two minutes so it binds properly, and then — the hard part — wait. Soy needs one to two weeks to cure. A great many makers have declared a batch a failure on day two and found it lovely a fortnight later.
Change one thing at a time. If a batch disappoints, resist the urge to change the wick, the fragrance and the pour temperature all at once — you'll never know which mattered. Keep a batch log, alter one variable, and you'll have a reliable recipe in three or four pours rather than thirty.
Wet spots
Patches where the wax has pulled away from the glass, looking like damp shadows. It happens when wax cools and contracts away from the container, and it is cosmetic only.
The fix: warm your jars slightly before pouring and cool the candles slowly. Temperature swings during storage can bring wet spots back even on a perfect candle, which is why professional makers keep their stock somewhere stable.
Sooting and a large flame
Black smoke and a tall flickering flame mean the wick is too large for the container, or the wick simply needs trimming. Trim to about 5 mm before every burn — it is the single easiest habit to adopt and it solves most soot complaints.