
Seaming Knitting Neatly: Mattress Stitch and the Alternatives
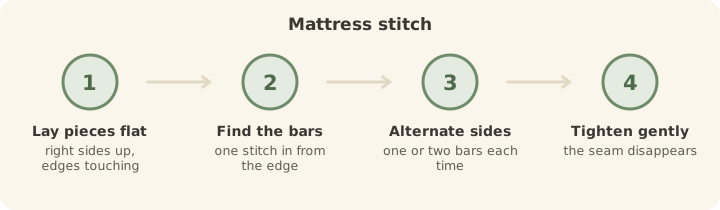
Use mattress stitch for side and sleeve seams — worked from the right side, one stitch in from the edge, picking up the bars between stitches on each piece alternately. It produces a seam that disappears completely.
Use a three-needle bind-off for shoulders, where you want firmness rather than invisibility.
Seaming has a reputation as the dreary part, and knitters routinely leave finished pieces in a bag for months rather than face it. It genuinely isn't hard — there is one main technique, it's forgiving, and an hour of it transforms a pile of flat pieces into a garment.
Mattress stitch, step by step
Lay both pieces right side up
Side by side, edges touching, with the rows lined up. Working from the right side is what makes this stitch so accurate — you can see exactly what you're joining.
Find the ladder of bars
One stitch in from the edge you'll see small horizontal bars running between the columns of stitches. Those bars are what you sew through, not the edge stitches themselves.
Alternate sides
Pick up one or two bars on the left piece, then the matching bars on the right, and keep alternating. Work loosely at first and don't pull.
Tighten every few inches
Pull the seaming yarn gently and watch the two edges draw together and the seam vanish. Tighten enough to close the gap, not so much that the seam puckers.
Matching pieces before you seam
Seaming is far easier when both pieces are the same length. Our gauge calculator converts between rows and inches so front and back come out matching in the first place.
Which seam for which join
| Join | Use this | Why |
|---|---|---|
| Side seams | Mattress stitch | Invisible, and keeps the fabric flowing |
| Sleeve seams | Mattress stitch | Same reasoning; work from cuff upwards |
| Shoulders | Three-needle bind-off | Firm and stable, so the garment doesn't sag |
| Setting in a sleeve | Backstitch | Handles the curve where mattress stitch can't |
| Garter stitch edges | Ridge join | Matches ridge to ridge, disappearing into the texture |
| Live stitches, e.g. sock toes | Kitchener stitch | No ridge at all, so nothing is felt underfoot |
Use the same yarn, unless it's fluffy. Seaming in the project yarn helps the seam disappear. If your yarn is very textured or splitty, use a smooth yarn in the closest matching colour — it will behave far better and nobody will see it.
Blocking first makes everything easier
Block your pieces before seaming, not after. Flat, settled edges line up properly; curling stocking stitch edges fight you the whole way. It's twenty minutes of waiting that saves an hour of frustration, and the finished seams are visibly better.
Do
- Work from the right side so you can see the seam forming
- Pin or thread-mark the halfway point of both pieces first
- Leave a long tail when casting on — it becomes your seaming yarn
- Tighten gradually rather than pulling hard at the end
Don't
- Seam through the very edge stitches — the seam will be bulky
- Use a sharp needle, which splits the yarn
- Seam before blocking, if you can help it
- Rush the last few inches, where mistakes concentrate
Questions we're often asked
What is mattress stitch?
An invisible seaming method worked from the right side, picking up the horizontal bars one stitch in from the edge on each piece alternately. When tightened, the two edges close together and the seam disappears.
Should I block before or after seaming?
Before. Blocked pieces lie flat with settled edges, which makes them far easier to line up and seam accurately. A light press after seaming can then settle the seams themselves.
Why do seamless patterns exist if seams are fine?
Seamless knitting avoids the finishing entirely and suits many knitters. Seams do add structure though — a heavy jumper with seamed shoulders keeps its shape far longer than one without.